

Leaks, cracks, and gaps around your windows can slowly lead to expensive repairs if they’re not properly sealed. Knowing how to caulk windows effectively can protect your home from the elements while also increasing overall energy efficiency.
Utilizing caulk window sealant can ensure your home stays safe and protected for years. Our experienced team at Rusco will walk you through the important steps of how to caulk a window, what materials you’ll need, and more, helping you save time and money.
With over 87 years of experience, trust the experts at Rusco for all your window needs.
Why Caulking Your Windows Is Important
Your windows are one of the most important factors in protecting your home from the outdoors, and the caulk provides the necessary sealed layer between the frame and the wall to keep it in place. However, caulking around windows offers many other benefits for your home as well.
- Reducing Energy Costs: Caulking a window reduces drafts and protects from air leaks, helping reduce overall energy costs as your HVAC unit doesn’t have to work overtime.
- Protecting Against Moisture Damage: Moisture can easily build up around your windows if you don’t properly seal them with caulk, both on the interior and exterior windows.
- Enhancing Home Comfort: No one likes a drafty house. Sealing around windows adds an extra layer of protection from the outdoors, improving overall comfort.
- Improving Aesthetic Appeal: Caulk for windows also adds an aesthetic appeal to your home, providing a layered and uniform look.
Caulking Windows vs. Replacing Windows
While the caulking of windows is sufficient for many repair needs, there comes a point when it’s in your home’s best interest to replace your windows entirely. Caulking windows is a much more cost-effective option when your home has issues like small cracks or you simply want to improve your home’s energy efficiency.
However, here are a few examples where it’s often a much safer – and necessary – idea to replace your windows instead:
- You have difficulty opening, closing, or locking your windows.
- You have rising energy costs from poor insulation.
- You see warping, rotting, or intense damage around the frame.
- You have single-pane windows.
- Your windows are more than 20-25 years old.
Learn more to know when it’s time to replace your windows from Rusco.
4 Types of Caulk and How to Choose
Before starting the process of learning how to caulk windows inside and outside alike, it’s important to understand the difference between types of caulk. Caulk for windows can take many different forms, and it’s important to know which is best for your specific needs.
Silicone Caulk
Silicone is an extremely flexible, durable, and waterproof caulk that is ideal for caulking exterior windows especially. Because of it’s flexibility, you don’t have to worry as much about it cracking or falling apart as the house expands and contracts with temperature differences. However, silicone doesn’t stick to wood windows, and it can be difficult to paint over as well. This type of caulk is also more difficult to apply and smooth out by yourself.
Polyurethane Caulk
Polyurethane caulk is a fantastic option that is highly durable and water resistant, offering added protection from moisture and other elements. While it’s a good option for exteriors, it’s important to note that this type of caulk can break down over time in the sunlight from UV rays, so make sure you paint over this caulk if you utilize it outside. It also tends to be a more expensive option than other caulk types.
Acrylic Latex Caulk
This type of caulk is a budget-friendly and easy-to-use option that is best suited for indoor projects. However, this type of caulk doesn’t expand or contract with temperature changes, meaning it generally isn’t the best idea to use for sealing windows in general.
Siliconized Latex Caulk
This type of latex caulk, on the other hand, is a great choice for sealing windows that are prone to more moisture exposure. So, not only can you use this outdoors – even though regular upkeep is imperative – but you can also utilize it for caulking windows inside, such as in the kitchen or bathroom.

Find tips for choosing which window material is right for your home.
Materials to Caulk Windows
Be sure to gather the materials you’ll need for your project in advance. Not only will this make the process more efficient, but it will also ensure that you do the project correctly and safely. Some materials you’ll need to collect before caulking window trim include:
- Caulking Gun
- Utility Knife
- Putty Knife
- Window Caulk: Latex, silicone, or hybrid caulk types
- Rags
- Bucket of Water
- Painter’s Tape (optional)
- Gloves (optional)
- Ladder (optional)
How Do You Caulk a Window?: Step-by-Step Guide
Now that you know what kind of caulk to use and what materials you’ll need, it’s time to start the process of caulking around windows. Here’s a step-by-step guide to how to achieve a clean, efficient, and long-lasting seal for your home:
Remove Old Caulk
Before starting, it’s imperative to remove any old caulk. This ensures that the new application adheres properly and efficiently. Use your utility or putty knife to carefully scrape away the old caulk, making sure to remove as much as possible.
Prepare the Area
Then, you need to prepare the frame thoroughly. Make sure you know where to caulk windows, and then clean the frame, tape it off so you get a smooth and even line, and put your gloves on if you have any.
Load the Caulk Gun
Securely load your caulk tube into the gun. If you choose a caulk gun that has a thumb release, make sure that it’s properly working so that your caulk will stop flowing immediately if you need it to.
Cut the nozzle and test the bead
After you load your caulk gun, you need to cut the nozzle. The wider the opening you make, the faster the caulk will come out, leading to a potentially messy application, so be careful not to cut too big of a hole. Cut the nozzle at a 45-degree angle, which makes it easier to reach difficult areas while still providing an even and steady flow.
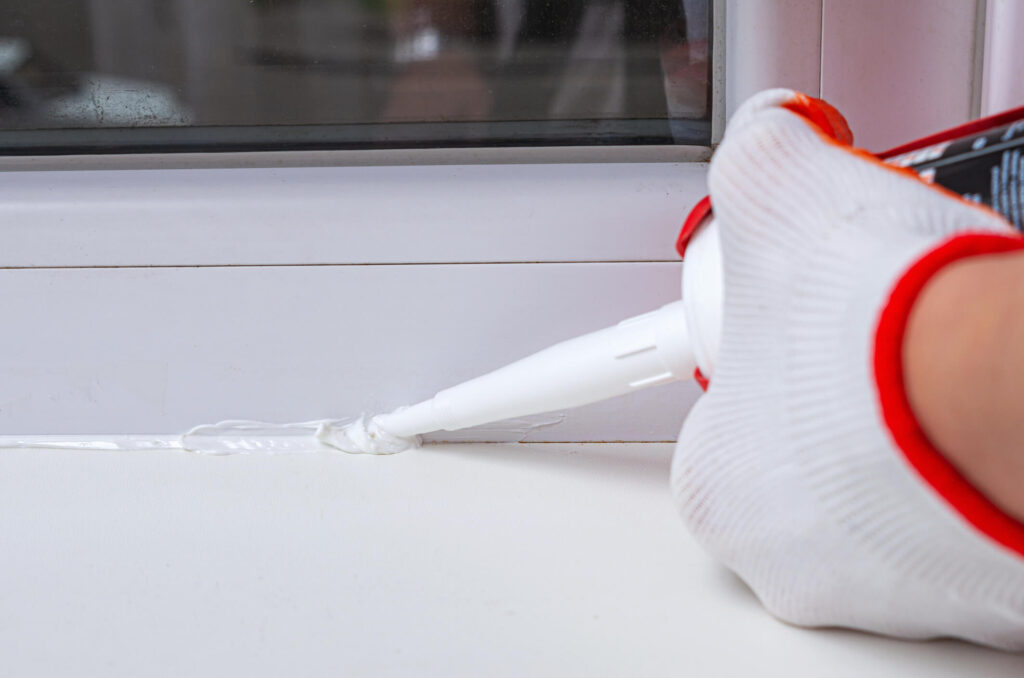
Apply Caulk to the Window
When you’re ready to apply the caulk, start at the corner of the window and apply continuous pressure to the trigger to create a smooth, continuous bead of caulk along the window. Repeat this process along each side of the window, going slowly to ensure a uniform look.
If you are starting a window caulking exterior project, you should wait for a relatively dry and temperate day. Humidity and cold can affect how the caulk dries and applies.
Smooth Over the Caulk
Once you have a straight and clean line, the next step is to smooth over the caulk with a damp finger, thin rag, or smoothening tool. This helps create a clean, polished finish. Make sure you don’t smooth the area too much, however, as this can remove too much of the caulk and mean you may have to start over again.
Allow the Caulk to Dry
After you’ve applied and smoothed your caulking for windows, you’ll need to let it dry. It’s imperative to let it cure fully before exposing it to moisture. This is another reason caulking outside windows in dry weather is important. The caulk should dry for at least 24 hours.
Clean Up and Inspect
Clean up any excess caulk immediately, and make sure to inspect the finished job for any gaps or uneven areas. This way, you can quickly fix them to create a tight seal for your window. If you have leftover caulk, you can seal the tube back up and store it in a dry, cool place to save it for future touch-ups.
Explore Rusco window options to find the perfect fit for any room in your home.
The Do’s and Don’ts of Window Caulking
While you now know the process of how to caulk windows, there are still some common pitfalls you should be aware of. Mastering these do’s and don’ts will ensure a smooth, professional-looking result while avoiding costly mistakes.
Here are some tips for the window caulking process that will leave guests or potential buyers thinking you paid an expert:
Do Choose the Correct Caulk
Choosing the right caulk for your needs is imperative for longevity and effectiveness. For example, choosing a waterproof caulk like silicone is important for exteriors, kitchens, and bathrooms especially. If you choose an acrylic latex caulk for these areas, it can lead to costly mistakes down the road.
Don’t Caulk Over Old Caulk
You shouldn’t apply any new caulk over old material, as this will weaken the adhesion and seal, creating uneven and ineffective results. Scrape off as much of the old caulk as you can before starting running a new bead along the surface.
Don’t Cut Too Much Off the Tip
As mentioned above, don’t cut too much of the nozzle off the tip of the caulk tube. Cut a small, neat hole so that you’re able to control the bead size when applying the caulk.
Do Use a Caulking Gun With a Thumb Release
Caulking guns with thumb releases allows for an easier and smoother application. With these types of caulking guns, you can simply press on the release to stop the caulk from flowing, preventing dripping and uneven lines.
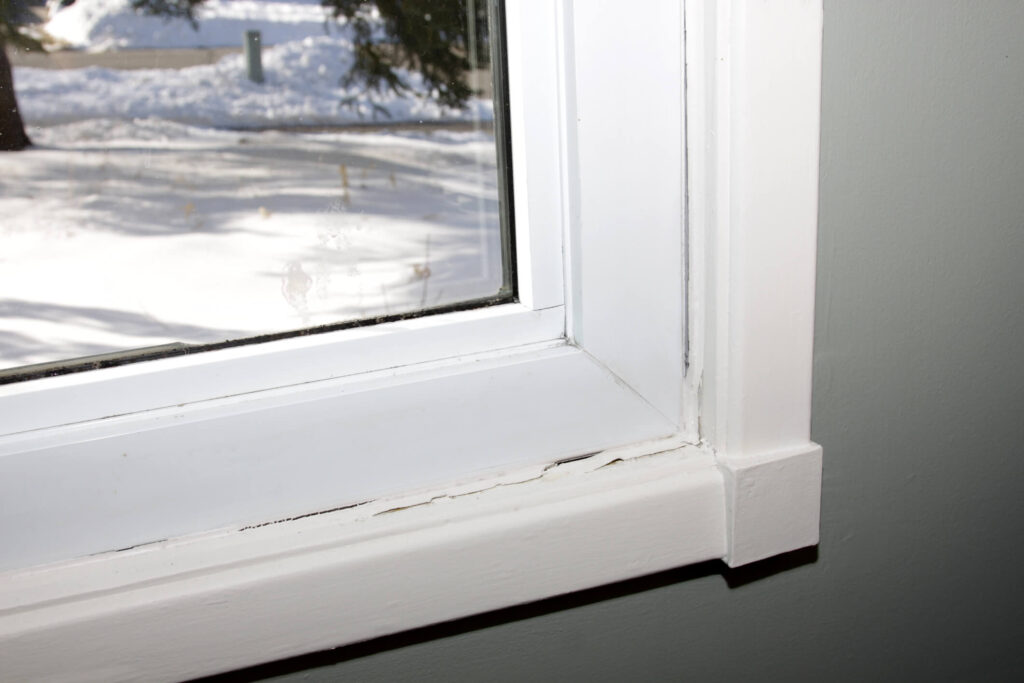
Don’t Wait to Replace Cracked Caulk
If you notice the caulk around your windows is cracked, it’s important to address this as soon as possible. Cracked caulk indicates that the seal has damage, allowing moisture, air, and other debris to enter your home, which leads to energy loss and further harm.
Don’t Smooth the Bead All the Way Through
When you’re applying the caulk to your window, over-smoothing the bead can remove too much of the material, compromising the seal and leading to an unappealing line of caulk. Only smooth the caulk as much as needed – resort to a smoothing tool if you need a more steady line.
Do Keep a Towel and Bucket of Water Nearby
Having a towel or bucket of water nearby is handy for doing any quick clean-ups during application, since it might take you once or twice to get the hang of how the caulk gun works and what pressure to apply the solution at.

Not sure if caulking your windows is enough? Learn what to expect from a home window replacement to help plan your next steps.
Do Ride the Smooth Edge When Caulking Textured Surfaces
If you’re caulking a textured surface, try to follow the smooth edge as much as possible. This creates a cleaner, more effective seal. If you caulk along the textured edge, the caulk bead will also turn out bumpy and textured.
Do Tape Off Your Seams if Needed
Just like painting a room and taping off baseboards or light switches, taping off your seams with painter’s tape ensures straighter lines while applying the caulk. This is especially true for beginners or if you’re caulking a tricky area.
Don’t Use Caulk as Filler
While it may seem like caulk could easily be used as a filler for some poorly-trimmed windows or larger gaps, it’s not a proper substitute. If you have larger areas that need caulking, reach out to a professional or put in a foam backing rod before starting the process.
Don’t Caulk Around Window Trim
Caulking trim or around weep holes – which are small openings that allow water to drain out – can cause damage, especially if you choose the wrong type of caulk for the project.
Do Call a Pro If You’re Uncomfortable
If you think your windows may need a more proper seal than you’re comfortable doing yourself – or if your windows are damaged – make sure you reach out to a professional to get the job done safely and effectively.
Trust Rusco For Perfectly Sealed and Efficient Windows
Caulking your windows properly can protect your home from the elements and boost overall energy efficiency. However, a fresh layer of window caulk can’t solve every problem you may be experiencing. Whether you’re a homeowner or property manager, trust the experts at Rusco to help you determine what solution your windows need to keep your space protected, safe, and looking it’s best.
Request a free window installation estimate from Rusco to learn more about new window options to breathe life into your space. With a wide selection from top-rated manufacturers and our trusted team of installers, trust Rusco to keep your home as beautiful and comfortable as possible. Reach out to us today to learn more about our professional window services and personalized recommendations for your needs.